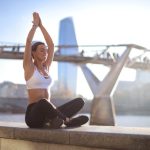
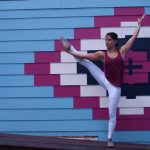
Chair yoga seems to be the next in vogue at the moment! And why not when it gives you the same benefits of a pose without exerting too much stress on the body? While many people think this style of yoga has been designed for senior citizens, I would strongly object. You need to practice to know how peaceful and calming a simple sequence of chair yoga is.
There are countless poses you could try with the chair. And, they are not restricted to seated poses. It also incorporates standing poses and backbends, using the chair as a prop.
Who Is Chair Yoga For?
This is an interesting question that I commonly come across. At its core, anyone regardless of age, ability or gender can find benefit from chair yoga, but it is very beneficial for people who find it difficult to balance themselves while standing. I would say chair yoga would be especially beneficial for:
- Senior citizens
- Pregnant women
- Post-natal yoga practitioners — during the initial phases
- Highly obese people
- People who spend lots of time in front of a computer or have a seated job
I’ve discovered that a quick sequence is perfect for me while I sit in front of the computer at work. It helps me relax instantly, and it’s also recommended for people (like myself) who suffer from digestive issues such as Irritable Bowel Syndrome.
Benefits Of Using A Chair
Amongst all the styles of yoga that are out there, what sets this one apart? Why trade in your mat for a chair, especially if you already have an established practice in another style? Chair yoga holds some unique benefits that can provide a great support for your regular practice, or as a stepping stone to getting onto the mat for the first time! Practising seated yoga…
- Allows you to hold poses for longer so you can release into them far deeper
- Since it’s a ‘portable’ form of yoga, it gets rid of the excuse that there’s no time or place to practice
- The support under your bum eases any pressure you might feel in your lower back
- Breathing in a seated position also lets you access a deeper breath than you might otherwise
Add to this the benefits of your regular yoga practice, and you can see why you’re hearing more and more about seated yoga. So if you’re looking for a gentler practice, and you’ve already exhausted my sequence for senior citizens, or if you just have an extra ten minutes at work, why not give this seated yoga sequence a try?
A Simple Chair Yoga Sequence
1. Tadāsana — Seated Mountain Pose
Many call it Urdhva Hastasana or Samasthithi. At its most basic, this pose tries to create an equilibrium between the two sides of the body by helping you build your balance and relaxing your spine.
Sit straight up, with your neck and spine in a straight line. Keep your buttocks glued firmly to the chair. On an inhale, lift your hands up and stretch your torso as if you are trying to touch the ceiling. Hold as long as you can, then release and relax with an exhalation.
2. Uttānāsana – Seated Forward Fold
Sitting for long hours usually hampers the digestive process, triggering various abhorrent conditions like bloating, IBS, and flatulence. For women, constant sitting could affect their menstrual and fertility cycles. This simple pose gives you a bout of stretching that could prevent and ease such troubles.
After seated tadāsana take an inhale. On an exhale allow your body to fall forward freely as much as possible. If possible, try to place your palms on either side of the feet. Hold the posture, normally breathing, as long as you wish to. Once done, inhale and come back to your natural seated position.
3. Utthita Pārśva Konāsana – Seated Extended Side Angle Pose
This is one of the most basic standing poses that helps tone your torso, arms and thighs.
Keeping your left leg in place, stretch your right leg to the right side. Turn your left foot out. Inhale and as you exhale, bend to the left and place the left palm outside the left foot. Hold the pose, sucking in your abdomen as long as you can and making sure you’re opening your chest to the ceiling for a deeper stretch. On an inhale, come up. Repeat the same posture on the other side with the next exhalation.
4. Garudāsana – Seated Eagle Pose
The standing version of this pose is a fabulous spine and back strengthener. As a seated pose, it will still stretch the shoulders and back, but it’s also very useful in creating an awareness about your balance and core strength.
Engage your belly button and bring it close to the spine. Roll your shoulder blades backward and extend your hands in front of you perpendicular to the floor. Place your left arm under the right arm and press the back portions of your palms together.
5. Ardha Matsyendrāsana – Seated Spinal Twist
I just love this pose. While I can’t do it perfectly on the mat, the twist it gives the abdomen is amazing. Since this pose requires you to keep clenching the abs it’s also great for core strength and awareness. Hold the pose for longer durations, if you can, to intensify the twist.
Don’t release the belly button when moving into the twist from Eagle Pose. Elongate and twist your body to your left on an exhale and push your knees to your right with the right hand. Let your left hand rest on your back, perpendicular to your spine. Breathe deeply and hold the posture. On an inhale, release your arms and come back to center. Repeat the same with the other side.
Prānāyāma Exercise: Alternate Nostril Breathing
I love ending my sessions with prānāyāma. I would choose to end a seated yoga practice with alternate nostril breathing, or nadeeshwara prānāyāma. Close your right nostril with the right thumb and your left nostril with the right ring finger. The tips of your index and middle fingers will rest in between your eyebrows on your third eye, while the little finger should be stretched out.
Close your eyes and exhale completely through your left nostril. Inhale slowly for a count of four through the left nostril and close it. Hold the breath for a count of four. Open your right nostril and exhale for a count of four. Repeat the same process by inhaling through your right, holding the breath, and exhaling through the left for the same duration. This completes one round of the prānāyāma. I would suggest ten rounds to start off with!
If you need a gentler practice today, or if you are a newbie to yoga, then you could definitely make this seated yoga sequence your starting point. And without the need to roll out a mat, you can definitely take this yoga anywhere! Let us know where seated yoga takes you!


